MoreMaps
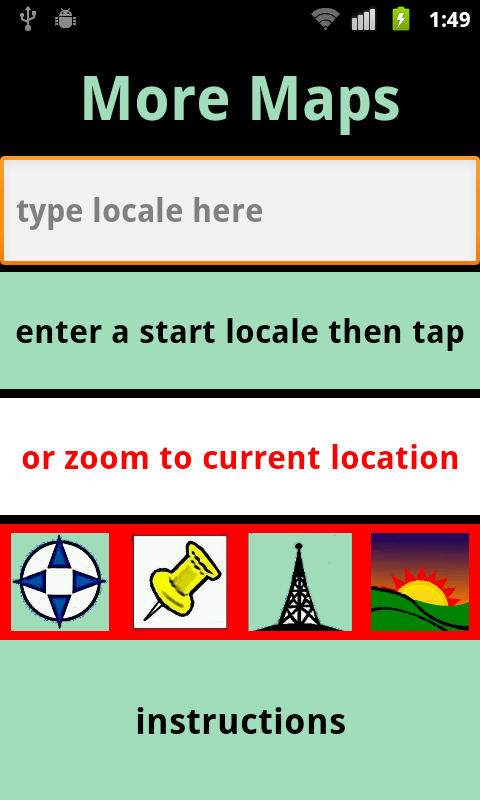

The More Maps app offers over a dozen tools to expand the mapping functions
available to users of Google Maps.
The four options reached from the landing page either open at, or
assume your location as your actual current position. Other options on the
main Maps page allow you to choose other localities.
LANDING PAGE OPTIONS
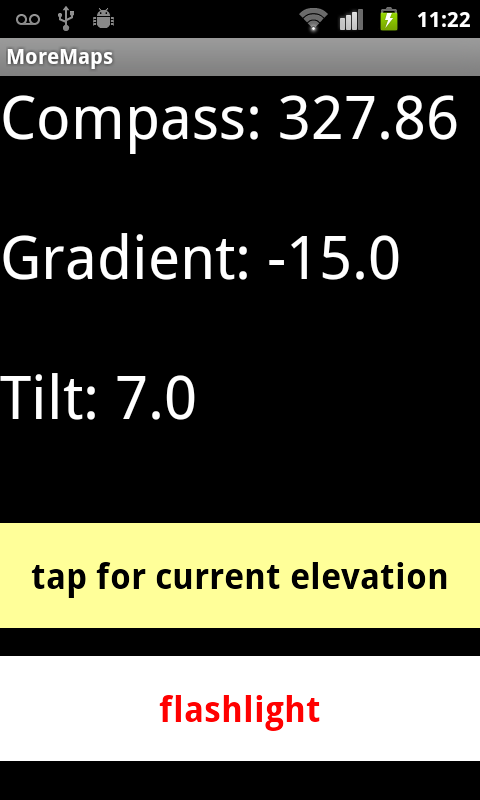
COMPASS AND LEVEL
The Compass icon, drawn as a four-pointed star, opens a page which
displays in real-time the compass bearing and alignment of the phone. The
button Flashlight leads to an all-white screen for illumination.
GEONOTE
The Thumbtack icon is a powerful feature for placemarking a site
of interest. It draws a circle and letter P on the screen and also, it
automatically mails your precise location coordinates to your home email.
After you click the Thumbtack icon, a second screen called GeoNote
appears with an Input Box which allows you to enter a short comment about
the site. When you tap the input box, the virtual keyboard opens to type
in your comment. If you tap the Microphone button at the lower left of the
virtual keyboard, you can enter a verbal comment which is translated to
text.
You must preset your home email before you use this feature for
the first time. You do this by tapping the button Email Setup at the
bottom of the GeoNote page which opens a new page called Set Receiver
Email. After you enter the email in the top box, click the middle button
to save it. To check that it was saved properly, tap the lower button,
Review Current Email Setting.
The email which is sent has a handy link which, when clicked,
opens a Google Maps page on your home computer with the placemarked
location marked by a green icon.
This GeoNote feature can also be used to share your location with
a hiking companion. To do this, set the email address to an account which
your companion can open on their phone, ie. their email address.
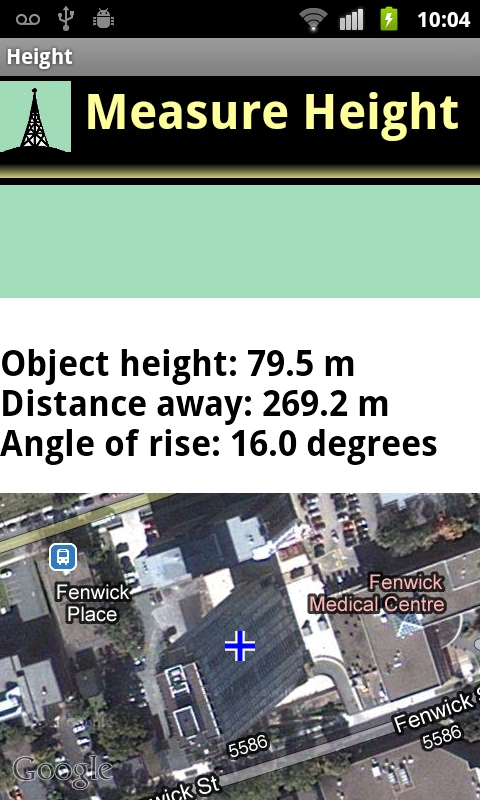
HEIGHT ESTIMATE
The Height icon is a tool to estimate the
height of remote
feature, such as a building or hill, using the camera viewfinder of the
phone and a map centred at your actual location. This tool has detailed
instructions activated by clicking the title at the top of the Measure
Height page.
SUNSET TIMES
The Sunset icon calculates the time of sunset,
sunrise and True
Noon and draws these alignments on a map centred at your actual location.
Also it displays the sunrise/sunset times at the top and bottom of the
screen.
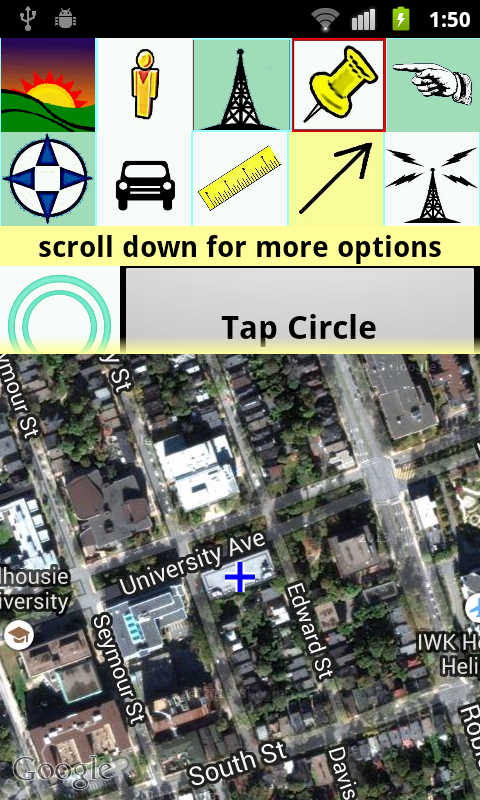
MAIN MAP OPTIONS
Ten of the options are contained in double row menu bar at the top of the
screen. Four of the options (Sunset, Level, Height and GeoNote) are the
same as the Landing page and will no be detailed again. These all assume
your position is your actual current location.
Tapping the main map causes the elevation to be diplayed for that
point of
contact.
More options are reached by scrolling down the center menu panel.
- The Yellow Man icon opens StreetView for the location at the
center of the screen. Just center the map and tap the icon to activate.
RECENTER
The Green Hand icon centers the map to your true location.
Unlike the Radio Tower icon below, it does not recenter the map if you
move or slide the screen. It works one-time only per tap. This icon is
more economical for battery life than using the Radio Tower icon and is
recommended.
For additional accuracy, or always if you are outside a city, the
Location setting of your phone should be set to Use Satellite location. To
change this setting, go to Menu>Settings>Location and Security>Use GPS
satellites. It takes a few minutes to first establish a connection with
GPS satellites, and you must wait. Also it prefers a clear view of the
sky.
This GPS Satellite setting is a battery hog, so when you are done
using it, you should return to the Use Wireless Networks setting.
STREET MAP
The Automobile button simply switches to the road map view
instead of the satellite image.
AUTOMATIC RECENTER TO LOCATION
The Radio Tower button continually
re-centers the map to your
true location. This is intended to work using the GPS Satellite Location.
This Radio Tower option uses more battery than the simpler one-time Blue
Hand button. When you are done with the Radio Tower button, click it again
to halt the background process.
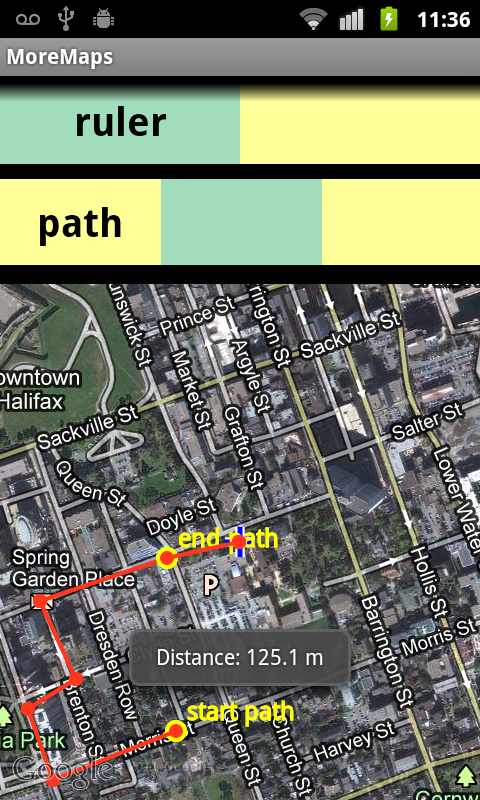
DISTANCE RULER
The Ruler button starts a handy measuring tape, with the origin
at the original center of the map. It shows the bearing and distance to
the new map center as you slide the screen to an end location. Tapping it
a second time makes the ruler disappear.
Tapping the Ruler button starts drawing a line segment at the
center of the map. The End button then is highlighted. Slide the map so
that your end point is at the center, then tap the End button. The line is
drawn in red on the map and the distance appears in a small pop-up box.
POINTER
The Yellow Arrow icon draws a large yellow arrow pointing in the
direction the phone is pointed. This makes it easier to orient yourself as
Google Maps always displays True North at the top of the screen, whatever
direction the phone is pointed.
EXTRA FUNCTIONS ON THE SCROLLING MENU
Now scroll down the menu panel until more options appear.
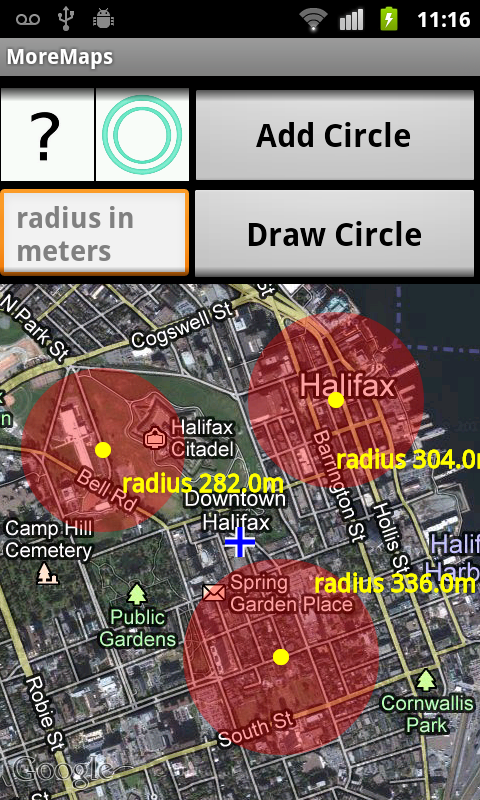
CIRCLES
The Circles icon draws a semi-transparent red circle radiating
out
from the original map center. First tap the Circle icon and then slide the
map until a circle of the desired size is shown.
The Add Circle button fixes the circle defined using the Circles
icon to its left.
The Radius in Meters input box allows the input of a selected
circle radius, in meters. Tap the box, maybe twice, and then input the
radius value.
The Draw Circle button fixes the circle defined previously using
the radius as entered into the Radius in Meters.
PATH
Tapping the Path button begins drawing a path at the map center.
The Tag and End buttons are then highlighted. Slide the map till it is
centered over an intermediate waypoint, then tap the Tag button. Continue
till you are at the end of the route, then tap End. The path distance will
appear in a small pop-up box.
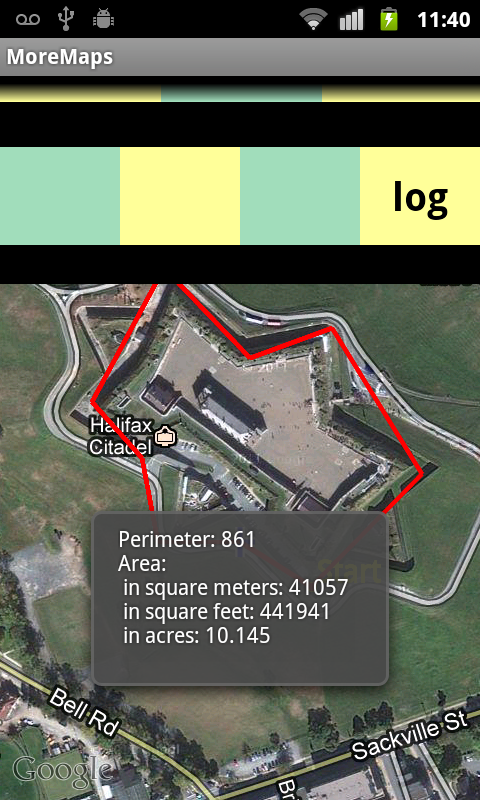
AREA
Next down the scrolling menu panel is a band labeled Area.
The Area button begins an operation to calculate the area of a
property traced on the map. The starting corner is tagged at the map
center. Buttons are now highlighted saying Tag and Close.
Next you slide the map and tag the successive corners by tapping
the Tag button. When you have marked them all, tap the Close button and
the closing segment will be automatically drawn. You do not re-tag the
starting/ending corner. The area and perimeter estimate appear in a pop-up
box.
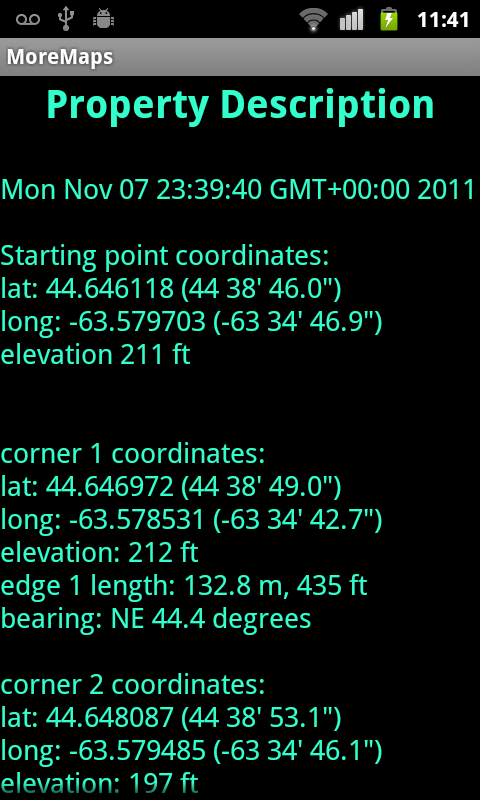
After you tap the close button, a new button called Log appears.
Tapping this opens a detailed property description with the location and
elevation of each corner, the length of each side, and the bearing of each
side. By the way, this data is saved to a text file on your phone under
the Notes directory called PocketSurveyor.txt , which you can copy or
email to your home computer.
ROUTE
Next down is the Route bar. Tapping Route is similar to the Radio
Tower icon described earlier except that the Route button begins a process
which draws your path on the map as you move and also saves a log of your
progress.
After you tap Route another button is highlighted marked Stop.
When you tap this, the tracking ends and you have the option of tapping
the Log button. This opens a detailed log of your route showing times,
average speeds, elevations and locations for each waypoint. This data is
also written to the file on the phone in the Notes directory called
PocketSurveyor.txt
This feature requires the Use GPS Satellites location setting
described previously, and this should be started well before using this
route and turned off after it is no longer needed to extend the battery
charge.
DIRECTIONS
Using the Directions tool low on the scrolling menu requires that you
first center the map to the from location, then tap the Directions Start
button. Next slide the map till it is centered over the chosen destination
and tap the right-hand button, Set Destination. The Google navigation
information will then appear.
PLACEMARK
The app allows you to set a placemark fo a site you wish to
highlight. These placemarks are saved in the device memory and will
re-appear when the app is re-opened. To set a placemark, first center the
maop to the location and type in a brief title in the Text Input Box
labelled Placemark name. Then tap the green button on the right called Add
Placemark and that site will be marked on the map and remembered.
To delete one of the placemarks, center the map near that site and
tap the button Delete Nearest, then display Confirm Site Delete. Tap that
too and the site will disappear permanently.
TOUCH ELEVATION AND OTHER APPS